01バックエンド/記事新規作成、編集、削除
ジェネレーターパッケージの導入 JeffreyWay/Laravel-4-Generators
とても便利なジェネレーターなるものがあるそうですので、Laravel4、ジェネレーターパッケージを参考にして入れてみました。特に resource と scaffold は、model、controller、migration、view、さらに database まで生成してくれるようですので、初心者がこれを使わない手はないでしょう。
$ php artisan generate:scaffold article –fields=”title:string, content:text, category_id:tinyinteger:unsigned, is_published:tinyinteger:unsigned”
と、コマンドラインから打ちますと
Do you want me to create a Article model? [yes|no]
Do you want me to create views for this Article resource? [yes|no]
Do you want me to create a ArticlesController controller? [yes|no]
Do you want me to create a ‘create_articles_table’ migration and schema for this resource? [yes|no]
Would you like a ‘Articles’ table seeder? [yes|no]
Do you want to go ahead and migrate the database? [yes|no]
と、次々に尋ねてきますので、エンターで進みますと
Done!
All done! Don’t forget to add `Route::resource(‘articles’, ‘ArticlesController’);` to app/routes.php.
と、丁寧ににルーティングまで指示してくれます。
fzaninotto/faker って何だ?
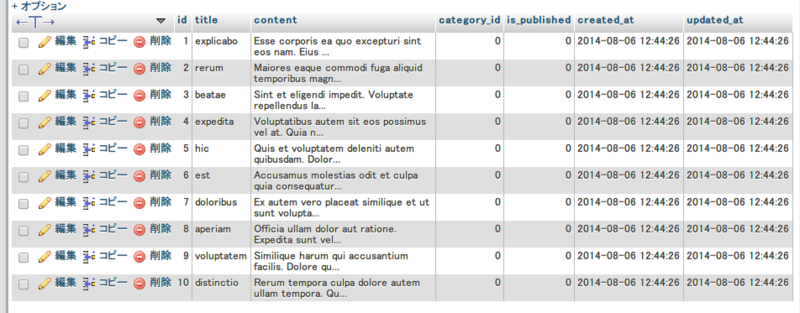
データベースに初期(ダミー)データを入れるための seeder を見てみますと、fzaninotto/faker を使う記述があります。何かと調べてみましたら、どうやらダミーデータを自動的に作ってくれるツールのようです。
app/database/seeds/ArticlesTableSeeder.php にある記述通り、composer.json に “fzaninotto/faker”: “v1.4.0” を追加してインストールしてみましょう。
$ composer update
Loading composer repositories with package information
Updating dependencies (including require-dev)
– Removing patchwork/utf8 (v1.1.24)
– Installing patchwork/utf8 (v1.1.25)
Downloading: 100%– Removing laravel/framework (v4.2.7)
– Installing laravel/framework (v4.2.8)
Downloading: 100%– Installing fzaninotto/faker (v1.4.0)
Downloading: 100%Writing lock file
Generating autoload files
Generating optimized class loader
ついでに laravel が v4.2.8 になり、patchwork/utf8 というパッケージもアップデートされたようです。で、ArticlesTableSeeder.php に fzaninotto/Faker · GitHub のフォーマットを参考にしてタイトルとコンテンツにデータが入るように記述します。
<?php
// Composer: “fzaninotto/faker”: “v1.4.0”
use Faker\Factory as Faker;
class ArticlesTableSeeder extends Seeder {
public function run()
{
$faker = Faker::create();
foreach(range(1, 10) as $index)
{
Article::create([
‘title’=>$faker->word,
‘content’=>$faker->text
]);
}
}
}
として実行するが、これがエラー!
$ php artisan db:seed –class=ArticlesTableSeeder
**************************************
* Application In Production! *
**************************************
Do you really wish to run this command?[Illuminate\Database\Eloquent\MassAssignmentException]
title
んー! 悩むことしばし、あれやこれやググって判明!
DB:Eloquent ORM にある「複数代入を使用するにはfillableかguardedプロパティをモデルに設定してください」でした。app/models/Article.php に
protected $guarded = [‘id’];
と記述して再実行! 無事10個のダミーデータが入りました。
ディレクトリ構成
ジェネレーターの scaffold コマンドで controller や view を作りますと、当然 app/controllers や app/views にファイルが作られてしまいます。これですとフロントエンドとバックエンドが混在してしまいますので、それぞれディレクトリを作って移動した方がよさそうです。
└ app/
├ controllers/
└ backend/
├ models/
├ views/
└ backend/
┣ articles/
┣ categories/
┗ blocks/
└ routes.php
バックエンドビュー
ジェネレーターで作られるビューファイルは中身が空ですので、まずはコンテンツ以外の骨格を作っておこうと思います。laravel には blade というテンプレートエンジンが付属しており、これが結構強力みたいです。
app/views/backend/master.blade.php
backend のディレクトリを admin から backend に変更しました。bootstrap3 の Fixed navbar を使ってみました。
<!DOCTYPE html>
<html lang=”ja”>
<head>
<meta charset=”utf-8″>
<meta http-equiv=”X-UA-Compatible” content=”IE=edge”>
<meta name=”viewport” content=”width=device-width, initial-scale=1″>
<title>
@section(‘title’)
Laravel4-blog
@show
</title>
<!– Bootstrap core CSS –>
{{ HTML::style(‘asset/css/bootstrap.min.css’) }}
<!– Custom styles for this template –>
{{ HTML::style(‘asset/css/template.css’) }}
<!– HTML5 shim and Respond.js IE8 support of HTML5 elements and media queries –>
<!–[if lt IE 9]>
<script src=”https://oss.maxcdn.com/html5shiv/3.7.2/html5shiv.min.js“></script>
<script src=”https://oss.maxcdn.com/respond/1.4.2/respond.min.js“></script>
<![endif]–>
</head><body>
<!– Fixed navbar –>
<div class=”navbar navbar-default navbar-fixed-top” role=”navigation”>
<div class=”container”>
<div class=”navbar-header”>
<button type=”button” class=”navbar-toggle” data-toggle=”collapse” data-target=”.navbar-collapse”>
<span class=”sr-only”>Toggle navigation</span>
<span class=”icon-bar”></span>
<span class=”icon-bar”></span>
<span class=”icon-bar”></span>
</button>
<a class=”navbar-brand” href=”{{{ URL::to(‘/’) }}}”>Laravel4-Blog</a>
</div>
<div class=”navbar-collapse collapse”>
<ul class=”nav navbar-nav”>
<li class=”{{ Request::is( ‘backend/dashboard’) ? ‘active’ : ” }}”><a href=”{{{ URL::route(‘dashboard’) }}}”>Dashboard</a></li>
<li class=”{{ Request::is( ‘backend/articles*’) ? ‘active’ : ” }}”><a href=”{{{ URL::to(‘backend/articles’) }}}”>Article</a></li>
<li class=”{{ Request::is( ‘backend/categories*’) ? ‘active’ : ” }}”><a href=”#”>Category</a></li>
<li class=”{{ Request::is( ‘backend/blocks*’) ? ‘active’ : ” }}”><a href=”#”>Block</a></li>
</ul>
<ul class=”nav navbar-nav navbar-right”>
<li><a href=”{{{ URL::route(‘logout’) }}}”>Logout</a></li>
</ul>
</div><!–/.nav-collapse –>
</div>
</div>
<div class=”container”>
<!– Content –>
@yield(‘content’)
</div><!– /.container –>@section(‘script’)
<!– Bootstrap core JavaScript
================================================== –>
<!– Placed at the end of the document so the pages load faster –>
<script src=”https://ajax.googleapis.com/ajax/libs/jquery/1.11.1/jquery.min.js“></script>
{{ HTML::script(‘asset/js/bootstrap.min.js’) }}
@show</body>
</html>
app/views/backend/index.blade.php
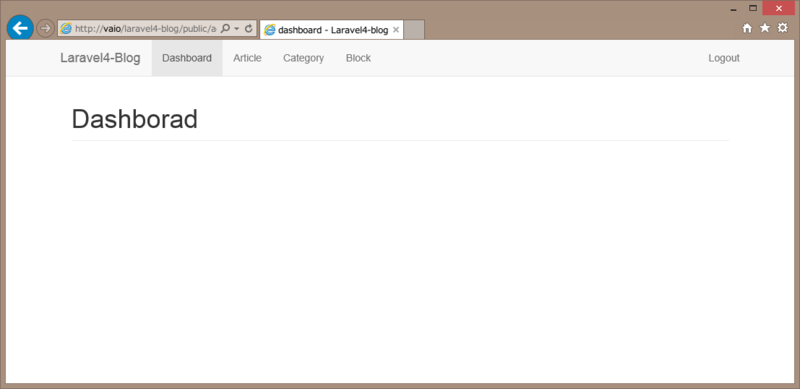
バックエンドのホームを dashboard として管理用のデータでも表示するかな?などと考えていましたが、あるいは必要ないかも知れません。とりあえずタイトルだけ表示させておきます。
@extends(‘backend.master’)
@section(‘title’)
dashboard – @parent
@stop@section(‘content’)
<h1 class=”page-header”>Dashborad</h1>
@stop
app/routes.php 追加、書き換え分
backend 全体にフィルターをかけるため when を使っていましたが、group でくくった方が path を簡潔にできますし、見通しも良くなりそうですね。
// BACKEND
Route::group(array(‘prefix’ => ‘backend’, ‘before’ => ‘auth’), function()
{
Route::get(‘dashboard’, array(‘as’ => ‘dashboard’, function()
{
return View::make(‘backend.index’);
}));// article
Route::resource(‘articles’, ‘ArticlesController’);
});Route::get(‘logout’, array(‘as’ => ‘logout’, ‘uses’ => ‘AuthController@getLogout’));
public/asset 以下に css, js, fonts ディレクトリを作り bootstrap 関係のファイルを入れておきます。これでログインするとバックエンドのホーム dashboard が表示されます。